Posted by Tigritza
First, we got the idea from a DIY book. I can't find the exact project online, but it looked something like this.
So if you took a look at the link above, you'll see there were a lot of moving parts here. First, the front and the back of the card. We opened a Powerpoint file and set to work - using our theme colors (red, orange, yellow), we came up with a design that was simple and, we thought, fun. We tried the printer at home, but lesson learned: if your printer came free with your computer purchase, it's probably not a very good printer. So Tasha spent hours searching our neighborhood for the cheapest printing shop that could do our job! We finally found it: Taws was fantastic! They worked with us to get the right paper and negotiate a price for printing AND cutting the rectangular front and back of the card! Score.
Next, the wheel - how were we going to do this? Tasha (she is awesome isn't she) found a cheap circle-cutter online, and used it to cut wheels out of the same paper we used for the card front and back. It was a ton of work, and turns out it's actually really hard to get the wheel perfectly cut (to get your starting cut to meet your ending cut, resulting in a perfect circle). Picture below. We also bought tiny little gold brads to hold the wheel to the front rectangle of the card.

We also had to use the circle cutter to cut a hole in the front of the card, to create a window through which you could see the images on the wheel! DISASTER. We lost about 10% of our cards this way...it is VERY hard to cut a small circle with this circle cutter. Oh well - Taws was nice enough to print a few extra for us (wisely anticipating such disasters) so we literally ended up with JUST the right amount of printed cards with useable circle-windows!
Next, the circular pictures: when someone turns the wheel, and looks through the circular window, what pictures do they see? After looking through lots of wedding sites online, we loved the idea of using the words "She Said Yes!" ...especially since there are two of us, both "she". We also were really excited about our date, Friday April 13th 2012... especially since the last Friday April 13th was in 2007, the day we met! So, we came up with two awesome little "logos" - on Powerpoint again, of course. We wanted the "She Said Yes" to look a little old-school, and the "Friday April 13th" to look a little quirky. And this is how they turned out! (I knew all those years making PPT decks as a consultant would pay off one day!)

So, those would be two of the pictures on our wheel! But what about the other two? We wanted pictures of us. So one cool Saturday September morning, before catching a bolt-bus to New York to see Tasha's parents, we took my camera, a tripod and ourselves down to Rittenhouse square. I set up the tripod and put Tasha in front of it, and took a light-test shot. Wow. The light was perfect, and Tasha looked phenomenal. So that was it! We had an absolute blast. We used the self-timer and just took a bunch of shots. A lot of them were really funny, with Tasha laughing or giggling with that giant smile of hers. We processed them later that night, and picked the top two! (Another 3 of the photos went on an awesome magnet we made to accompany the Save-The-Date (also made in Powerpoint, and also printed at Taws).... but unfortunately there's absolutely no way to display that here on the blog anonymously, since our faces are all over it!)
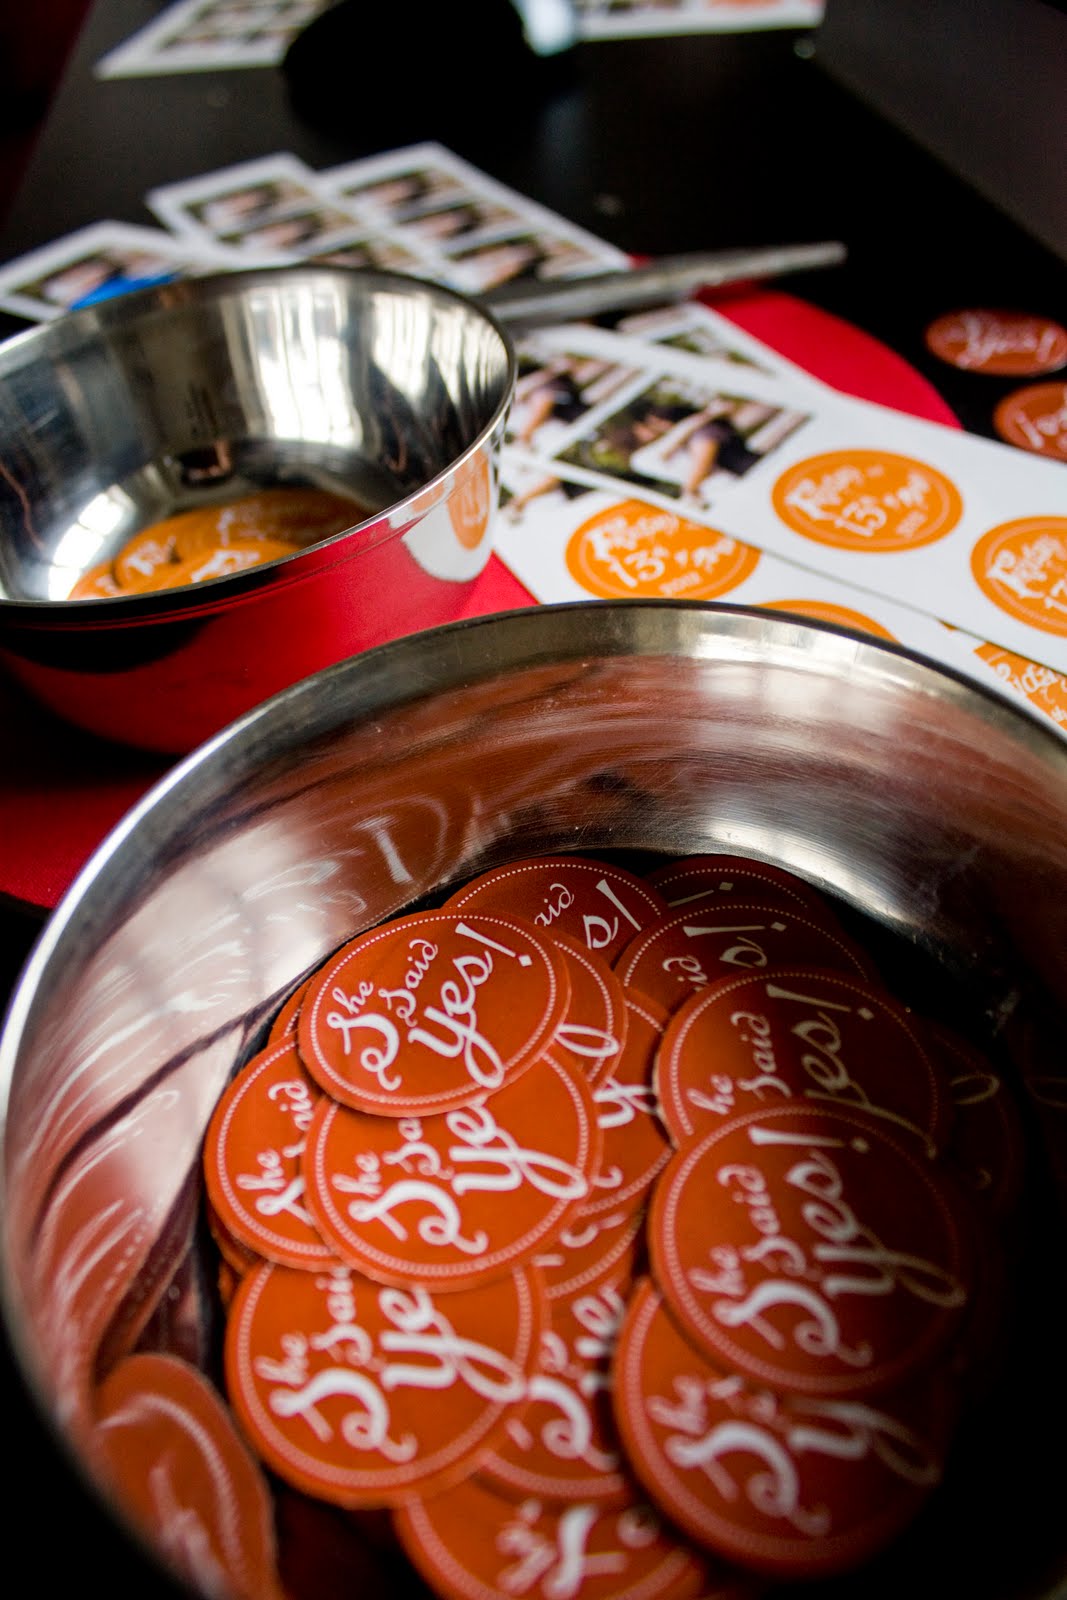
Taws was able to print our circles on huge pieces of sticker paper. Tasha had bought a circle punch of the perfect size online, so I cut the stickers into strips...

and set to work punching them out one by one! Over 300 punches in total. Each punch required aligning the circle perfectly in the 1.25-inch circle punch, slipping a piece of foil under it (apparently this helps smooth the cut) and applying herculean force onto it to snap the circle out perfectly. My PALMS were bruised by the end of the day... so much so that holding onto the banister of our staircase hurt! Below is a pic of me working the circle punch on our coffee table.

...So, I wasn't the only one hurting. Turns out, Mr. Circle Punch wasn't too happy either. He decided to break down halfway through our operation. We called a bunch of craft stores in Philly, found one 10 miles away that carried the right size, and I biked all the way over there...only to be told they were mistaken, they didn't have the right size. So I biked all the way back home, near tears and extremely dejected, and we decided we had to make it work. Using masking tape, we assembled and stuck the punch back together and pushed on. We had to change the masking tape every 20 punches or so, but we finally got through it all! Et Voila - the bowls of circles finally added up!
And finally: Putting it all together. With double-sided tape from PaperSource (an incredible crafts store where we found a bunch of our supplies!) Tasha stuck the front and back of the card together after attaching the wheel. Then, exhausted, we created an assembly line: Tasha peeled off each sticker and I went through sticking them on the wheel of each card. DONE! Below are four shots, showing each of the four stickers in the 'window' as the wheel is turned. (Our names have been hidden, sorry!) You can click on the photo to magnify.
She Said Yes!

Yep, the last line is my favorite part...

Friday The 13th

Last photo -

THE BEST PART: Mailing them. Seriously. We bought Persimmon-colored envelopes from PaperSource, and printed each address individually using our printer at home. We were so psyched to see how far the Save-The-Dates were travelling. They went out to 38 cities: in the United States, South Africa, Russia, India, United Kingdom, United Arab Emirates, Israel, Brazil, China, and Canada.
(My favorite was the Russian one, which actually had to be typed out in Russian. класс!)
So - THANK YOU for being so cool and living in so many places!!
[Again, sorry for the censoring but we had to do it. Click on the photo to enlarge - ]

...On a Saturday evening, we took our big bag of Save-The-Dates and dumped them in a mailbox on 19th and Chestnut. It was...strange.
Me: "Is it safe to just leave them here? What if someone breaks in?"
Tasha: "Breaks into a mailbox...and steals our save-the-dates. Really??"
Me: "It's starting to rain. Are mailboxes waterproof?! What if they get ruined???"
Tasha: "Let's go home." She took me by the hand and dragged me back to our apartment, stopping to buy me a Twix ice cream bar on the way. Yep, she's that good.
Tasha: "Let's go home." She took me by the hand and dragged me back to our apartment, stopping to buy me a Twix ice cream bar on the way. Yep, she's that good.
Save-The-Dates: check!
THANK YOU for posting this! I've been wondering about them so much since I got my beautiful post :) It's so awesome to see the work and thought that went into them behind the scenes. Can't wait to see the actual invites now...we're in the middle of the terrifying process of ours...eek.
ReplyDeleteWith each post that I read I just get more and more excited for your wedding. You lovelies has so many interesting people in your life. I'm wicked happy for you.
ReplyDeleteHugs from Russia.